
About the authorMy name is Marquise Deal, sophomore at Durham School of the Arts.
Disclaimer: " views and opinions expressed in this blog are solely those of the author and do not represent those of Durham School of the Arts or Durham Public Schools.")
|
|
To be completely honest, I have not yet worked with Simulations all but one time. I created a basic tiger clothed pillow for my portfolio. It was straight forward and easy too use. But I was asked the question, what simulation tools and techniques do you think you would get the most use out of in creating a video game and why? Daylight Systems & Cloth System would be used honestly. Lets start with the Cloth System and lets say we're making a superhero and villain video game. You need costumes/clothing for the characters, and using the cloth system would give them realistic fabric clothing and then you can add material you designed in Photoshop for the characters costume/clothing. Now unless our game is set in night for the entirety of the game. We need to simulate our scene from day to night. The Daylight System helps model the transition from night to day or day to night and any type of atmospheric changes. Summaries;
“Simulations and Effects ” Autodesk Support & Learning, 15 June 2017. “Sunlight and Daylight Systems” Autodesk Support & Learning, 5 Dec. 2017.
0 Comments
Which modeling technique do I prefer and why ? I prefer using Surface Modeling, because it requires less math and is I feel like there is more freedom when working with Surface Modeling. While Parametric is more accurate and what not, Surface is just more easier for some starting out in 3ds Max. Surface Modeling vs Parametric ModelingLets start with explaining the two modeling techniques, Surface Modeling is working with sub-objects such as vertex, edge, border and polygon. You use this sub-objects to edit the surface of a primitive. Here's a example, lets say you wanted to make a dice and want the edges rounded. You would convert the cube to a editable and then select the vertex sub-object and chamfer the vertex on all the points of the cube. Surface Modeling also works with combing and grouping objects. Now, geometric (parametric) modeling is creating precise measurements for primitives then modifying the current parameters. Another thing with working with Parametric Modeling is the symmetrical modifier, any edits made on the original side is applied to the other. Let say you made a car, you of course wouldn't model the whole thing that's time consuming. You model of half and then use the symmetrical modifier and mirror the original half of the car.
Summary;
knowledge.autodesk.com/support/3ds-max/learn-explore/caas/CloudHelp/cloudhelp/2017/ENU/3DSMax/files/GUID-C7F01818-502C-499B-8FD5-1F6742298DC7-htm.html app.schoology.com/page/1640613233 app.schoology.com/page/1650368740 I have played the game and enjoyed it. Legendary Entertainment recently released the trailer for their movie "Detective Pikachu". To be completely honest it was quite entertaining. Justice Smith is one of the main characters, I think he will bring create acting ability and humor to the movie. The movie shifts from the standard "catch a Pokemon and train them" idea and is sort of combining modern civilization and Pokemon. So its not like Pokemon are these weird creatures.
Summary;
Kastrenakes, Jacob. “9 New Trailers You Should Watch This Week.” The Verge, The Verge, 17 Nov. 2018, www.theverge.com/2018/11/17/18098568/new-trailers-detective-pikachu-toy-story-4-dumbo-more. “Pokémon Detective Pikachu.” IMDb, IMDb.com, www.imdb.com/title/tt5884052/fullcredits. Warface is a free first-person shooter video game. The game consist of Player vs Player and Co-operation. You could compare this to similar first person shooter games, Call of Duty and Battlefield.
As soon as you open the game your prompted to complete the combat training. It basic aiming, jumping and sprinting help. Its a overall good game. Nothing stands out about this game in my opinion besides the fact its realistic when it comes to graphics. There is no real storyline to base this game of. If you intrestead in a basic first-person shooter, I would recommend playing this for a couple of weeks and then move on to Call of Duty or similar titles like CoD. Fortnite Season 6 was announced September, 27 2018 with the theme "Darkness Rises". The opening cinematic for the season is Loot Lake, a point of interest shooting up from the ground and now floats above the Battle Royal Map. Then runes from the previous scene becoming "Corrupted Areas' with new Shadow Stones, making the ability to become invisible for a certain time period.
Also coming with Season 6 is the new battle pass which includes the following outfits; Calamity & DJ Yonder (Tier 1), Giddy-Up (Tier 23), Fable (Tier 47), Dusk (Tier 71), Nightshade (Tier 86) & Dire as the Tier 100 skin. Also with the battle pass you can earn pets which will act as backblings, you can also earn cool emoticons, emotes dance and sprays, at the price of 950 V-Bucks. Along with various map changes, new skins and consumables. Five weapons have been added the list of vaulted items in the game. These weapons include Impulse Grenades, Suppressed Submachine Gun, Light Machine Gun and Remote Explosives. Another week down with 3ds maxs. I feel way more confident than I did than the past couple of weeks. I was finally introduced to "materials". Materials allow you to add specific effects to a certain part of a primitive. Everything is easy to manipulate and navigate when your working with materials. This is something I was hoping that came with 3ds max. But one thing I am still confused with is which materials input to what and which don't. So I researched more about this subject.
You have the two main components when working with materials. Maps and standards, maps go into standards. Example say you wanted to create a nice looking spaceship. You would create you spaceship using a box primitive and messing around with the vertexes after converting it to a editable poly. Then click the "m" key to maximize the materials window. Now you drag out the standard material. Now you want to add like a NASA logo on top on the spaceship so you would want to use the bitmap "map" and set that as your diffuse color. Now you want to add more but you can't because their can only be one diffuse color for a standard. This is when you want to use the "composite" standard so you can add multiple maps. You can now add things like the marble tint, dent, cellular to make it look more of a spaceship. In Conclusion;
References; https://knowledge.autodesk.com/support/3ds-max/getting-started/caas/CloudHelp/cloudhelp/2018/ENU/3DSMax-Tutorial/files/GUID-5BA72891-97EC-4688-8B50-9FACCF1FF040-htm.html This week I worked a 3D modeling project with a lot of freedom. I decided to create a modernized lamp. I referenced it to a lamp I found on google with holes in it, as well as a box/spherical body to it. Immediately I knew I had to use a box primitive and turn it into a editable poly and then add the spherify modifier. Then modify it into a sphere. Then I Ctrl-clicked out a pattern and once I did that all the way around the sphere. Once that was finished I extruded it inward to create that hole effect. Next I had to add the actually lamp part. So the last primitive I used was the cylinder. I made one with the dimensions so It was real tall and skinny. That resembled the lamp rod. Then lastly I need to make a lamp cover. So I made another cylinder and scaled that one to be a little bit larger. This was my final product.  This week in class, we begun modeling in 3D studio max. We built a snowman and started working on a pencil. I learned all the tools necessary to make the basic things in the application such as, making the 3D objects, scaling & rotating and working on the x axis, y axis and z axis. When building the snowman you had to use 4 type of objects. The sphere, cone, box and cylinder. You wanted to first stack the spheres to make the snowman's body. You want to set the coordinates to 0, 0 and 0. Then move the spheres up on the Z axis. That would make then look like they were on top of each other like in image 1. Secondly the snowman needs buttons so you would want to draw out more spheres but then scale them down so they are small like buttons are. Then you want to set their coordinates to 0, 0 and 0 by right clicking on the X, Y and Z at the bottom. Then you want to pull them forward using the Y axis, so that they're visible. Repeat that until you have 3 buttons. Then you want to do that again for the eyes but gives the eyes some space. Now draw out your cone for the nose and set its coordinates to 0,0 and 0. Then bring it forward on the y axis so that it is visible just like you did for the buttons and eyes. Once your finished you should have a basic snowman just like image 2. You can add arms and a hat with playing around in the box object and cylinder object. In conclusion;
References; https://www.youtube.com/watch?v=FjcFmptG2zw 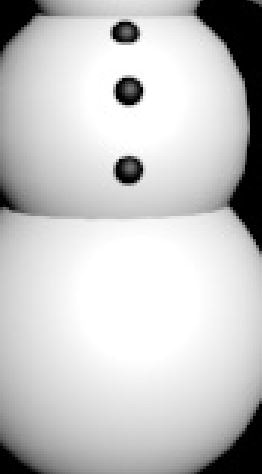 To be completely honest with myself, my creative process was rushed and in a hurry. I spent extra time on parts of the project that I did not need to when I could have solved it by making my pre-production better. The recording process was pretty unique. I recorded my audio from my written script then just recorded myself actually doing what the recording says. Then sync that up together in Premiere pro.
I decided to research some helpful steps to make my pre-production a lot better when making videos. One helpful tip I found was that get to the point in 8 seconds. In my videos I rumpled on about this and that for too long instead of getting straight to the point of the tutorials. Another helpful tip that I found was story boarding. Although this was a tutorial. I could have still story boarded what I was going to say at this moment in time with this footage of video. To add to that make a shot list of things I am going to need to record for the voice over. Lastly I should probably use a checklist and make sure I have everything done in the pre-production before shooting my actual video. In conclusion;
https://www.singlegrain.com/video-marketing/20-pre-production-steps-to-video-content/ https://www.studiobinder.com/blog/ultimate-pre-production-checklist/ This week in class we worked with Illustrator to create a logo for a company. Most graphic designers design and create logos for clients on Illustrator. I came up with the question, why? I know Illustrator and Photoshop have their differences in the way stuff is created but why do designers prefer making a logo in Illustrator rather Photoshop.
To answer my question I searched the following; why do designers use Illustrator rather Photoshop for making logos. Here is some of the answers I found, Illustrator gives you more of a controllable ability. In Illustrator you use mathematical points and solutions to create paths and strokes. So for example you want to change how long a stroke or line is on a part of your logo you don't have to guess for where want the part of your logo to be smaller at. You do math to get you the exact length you want off and this helps in the long production stage to make things a little less harder. Second reason I found was that you loss quality when resizing stuff in Photoshop but in Illustrator your quality of your design stays the same when you resize it .The last reason and the one I think gives me the best answer is, Photoshop should be used for photo manipulation and editing things already made. Illustrator is used for making and creating from scratch. In conclusion;
Hyperlinks; Adobe vs Illustartor |
